Creating a Hurricane Proof Roof: Coatings, Fastening Systems and Retrofit Options
If you manage roofs in hurricane country, a hurricane proof roof is a cost and liability decision that deserves a targeted plan. This guide walks owners, property managers, and realtors through what coatings can realistically do, which fastening and attachment systems resist wind uplift, and the retrofit steps that deliver the biggest resilience bang for your buck. You will get specific product and code references, a practical decision framework for repair versus replacement, and inspection and documentation tips that matter for performance and insurance.
Set performance targets and understand failure modes
Start with measurable targets, not products. Determine the design wind speed and exposure for your site, then translate those into uplift pressure and water intrusion targets that a retrofit must meet. Use local code inputs such as the Florida Building Code or guidance from IBHS FORTIFIED and FEMA building science resources when you set targets.
How to convert wind into specs. At minimum capture three items: the required design wind speed, the exposure category for surrounding terrain, and the building importance factor. From those you specify required uplift capacity for critical details – eave, rake, ridge, and roof to wall connections – and acceptable fastener spacing or clip ratings. Demand products with test evidence such as Miami-Dade NOA approvals when high wind ratings are needed.
Common failure modes to target
- Edge blowoff: inadequate attachment of edge metal and underlayment leading to sequential wind damage
- Roof to wall separation: weak or missing hurricane straps and connectors allowing the assembly to peel away
- Seam and flashings failures: welded or taped seams on low-slope systems that open under uplift and ponding
- Fastener failure or corroded substrate: nails that pull out from wet or degraded sheathing
- Impact and breach points: penetrations, ridge vents, and skylights that permit cascading water entry
Practical tradeoff to accept. You can spend less by coating and delaying a full replacement, but coatings do not increase mechanical uplift resistance. The most cost effective resilience work targets attachments first – adding straps or continuous clips and upgrading edge metal returns far more risk reduction per dollar than a coating alone.
Concrete example: A residential property in coastal Biloxi had a 20 year shingle roof with missing nails at the eave and loose edge metal. The team installed Simpson Strong-Tie straps at rafters, re-fastened edge metal with ring shank nails, then applied a localized silicone coating on an attached low-slope porch to stop leaks. The retrofit prevented uplift failures and extended the main roof life without full replacement. See real local coating contractors at Who Is The Best Roof Coating Contractor In Biloxi MS | FAQ.
Judgment that matters. Inspectors often underweight edge and roof to wall details because they look cosmetic. In practice these are the failure points that start catastrophic loss. Specify attachments and ask for manufacturer or Miami-Dade test references in the contract rather than relying on generic terms like weatherproof or high-wind.
Document the existing condition and the installed details with photos and signed wind mitigation forms to preserve insurance credits and make retrofit benefits verifiable.
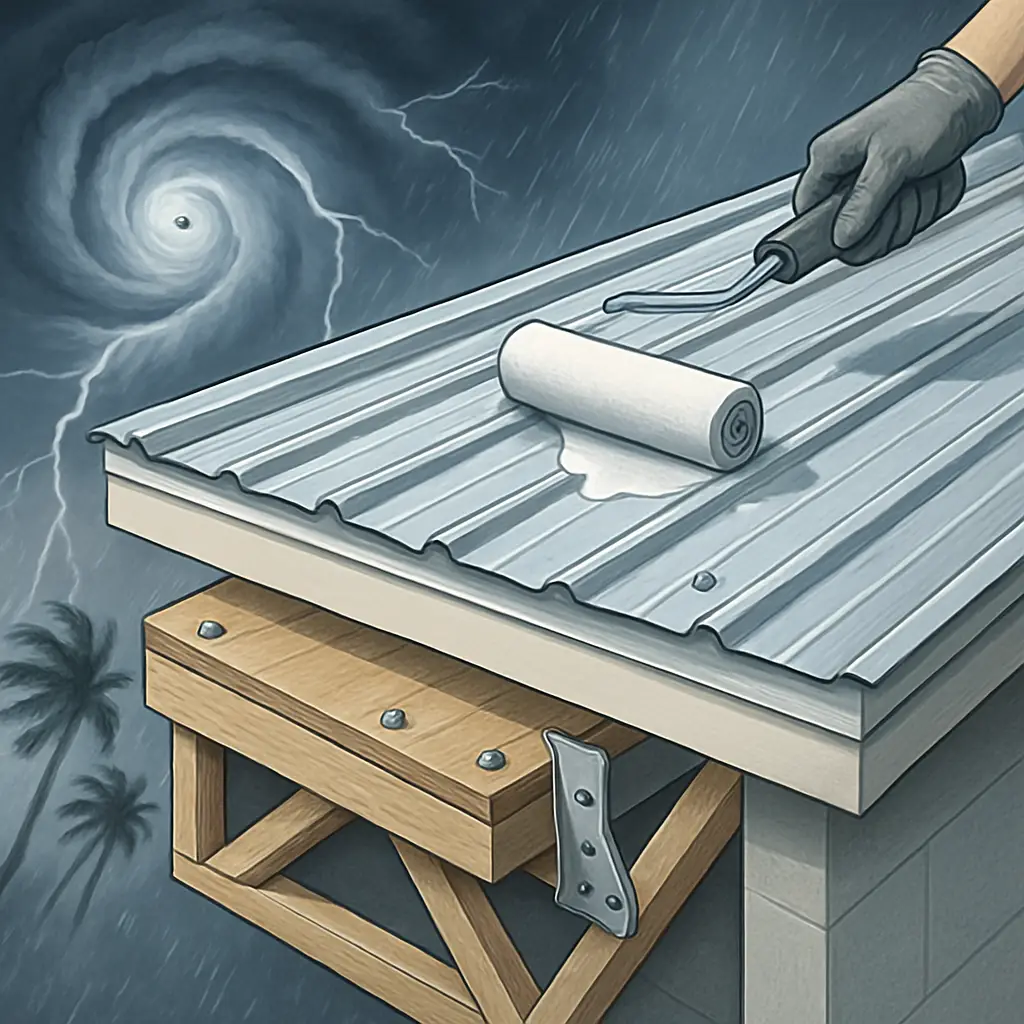
Roof coatings: types, realistic benefits, and product examples
Start with purpose: use coatings to fix water intrusion problems, slow UV and substrate degradation, and improve reflectivity — not to substitute for attachment upgrades that control wind uplift. Coatings buy time and reduce leak risk on sound low-slope assemblies; they do not reliably add certified uplift capacity unless they are part of a tested assembly with manufacturer documentation.
Coating chemistries and when to choose them
- Silicone: excellent for ponding water and long-term elasticity; resists wash-off and retains reflectivity. Good on aged single-ply and BUR when substrate is dry and clean.
- Acrylic / elastomeric: lowest cost, good UV protection and reflectivity but poor for persistent ponding. Works best on sloped or well-draining low-slope roofs.
- Polyurethane: high abrasion and foot-traffic resistance; more expensive and requires strict cure conditions. Use where membrane durability and impact resistance matter.
- Asphalt-based and bituminous emulsions: economical for built-up roofs and flashings; limited elasticity and UV life compared with silicone or acrylic.
Practical tradeoff: silicone systems last longer in ponding conditions and need fewer re-coats, but initial cost per square foot is higher and surface preparation tolerances are tight. Acrylics are cost-effective when drainage is good and budget is tight, but you will recoat sooner.
Concrete example: a 20,000 square foot commercial modified bitumen roof with repeated split seams and minor ponding received a polyester-reinforced silicone system from Gaco applied after replacing 10 percent of deteriorated membrane. The coating stopped recurrent leaks, extended the roof service life by an estimated 8 to 12 years, and deferred a full replacement while improving roof reflectivity for energy savings.
Product examples and application notes
- GacoRoof silicone systems: best for ponding and UV resistance; specify reinforcement fabric at flashings and seams and strict moisture limits.
- Sherwin-Williams and Henry acrylic elastomerics: good for dry, well-drained roofs and when cost is primary constraint; require regular recoat cycles.
- Carlisle bonding adhesives and single-ply coatings: used where an adhesive application is part of a tested single-ply assembly; consult product approvals for uplift performance.
- Mule-Hide and similar asphalt emulsion coatings: economical flashing repairs and temporary extension for BUR and asphaltic systems.
Specification detail that matters: require manufacturer approved primers, test a small adhesion area before full application, and document dry-film thickness to meet ASTM D6083 or the product technical data sheet. Contractors often under-spec thickness to save cost; that directly shortens life.
Judgment call: choose coatings when the membrane and attachment are fundamentally sound and your priority is leak control, energy savings, or life-extension at lower cost. If sheathing is delaminated, fasteners are corroded, or uplift ratings are inadequate, spend the money on structural retrofits or replacement first.
Next step: inspect substrate and attachment condition; if the assembly is sound, get firm product specs, ASTM or Miami-Dade approvals where applicable, and a documented application plan before approving a coating project.
Fastening systems that resist uplift: shingles, single-ply, and metal roofing
Key point: Mechanical attachment is the single largest determinant of uplift performance — not coatings. Fasteners, patterns, clips and wall connections set the roof system wind rating; materials only matter after attachment is sorted.
Shingles: nails, patterns, and realistic retrofit limits
Practical detail: Use ring shank or spiral shank nails, correct length (penetrate deck by at least 3/4 inch or through sheathing), and follow manufacturer high-wind nailing patterns. Products with reinforced nail zones such as Owens Corning Duration with SureNail or CertainTeed Landmark PRO simplify proper placement and reduce misnails.
Trade-off: Retrofitting existing shingle roofs by changing nail type is low cost but only effective when the deck and underlayment are sound. If sheathing is degraded or multiple layers exist, nailing changes give diminishing returns and a replacement is often the only way to meet ASTM D7158 Class H or local code uplift requirements.
Single-ply membranes: fastener plates, adhesives, and seam quality
Installation insight: Mechanical fasteners need the correct plate size and pattern density; undersized plates tear under cyclic load. Adhesive systems such as Carlisle bonding adhesives work well on clean, dry decks but fail if moisture or contamination exists. Seam welding quality matters as much as edge attachment.
- Must-check: plate diameter vs membrane pullout rating for your membrane
- Limit: adhesives do not perform on wet or contaminated substrates — verify deck moisture before specifying
- Verification: require seam weld pressure tests and a manufacturer inspection report
Metal roofs: concealed clips, continuous attachment, and thermal movement
Judgment: Concealed fastener standing seam with continuous clips and mechanical seaming is the best practical roofing for hurricanes when budget and substrate allow. Exposed fastener panels are cheaper but remain vulnerable to screw pullout and leak paths.
Design consideration: Use S-5! clamps or manufacturer-recommended clips for retrofit connections where through-fastening is unacceptable. Account for thermal expansion: clip systems need sliding solutions or stress will concentrate at fasteners and cause fatigue failures.
Concrete example: On a 1998 coastal duplex we replaced through-fastened panels with a mechanically seamed standing seam profile by McElroy Metal, added continuous clips to the purlins, and tied the eave into Simpson Strong-Tie hurricane straps. Cost was roughly 40 to 60 percent higher than a basic re-screw job, but uplift testing and the Miami-Dade NOA-compliant details qualified the owner for a substantial wind mitigation premium reduction.
Edge and roof-to-wall connections are the failure point in most wind events. Upgrading fasteners on the field of the roof without addressing edges and straps wastes money.
Targeted retrofit measures with the highest resilience payoff
High leverage retrofits first. In practice, reinforcing a small set of weak points reduces most hurricane losses: roof to wall connections, perimeter edge attachments, and secondary water barriers. Tackle those before cosmetic work or broad overlay projects.
Critical retrofit targets and why they matter
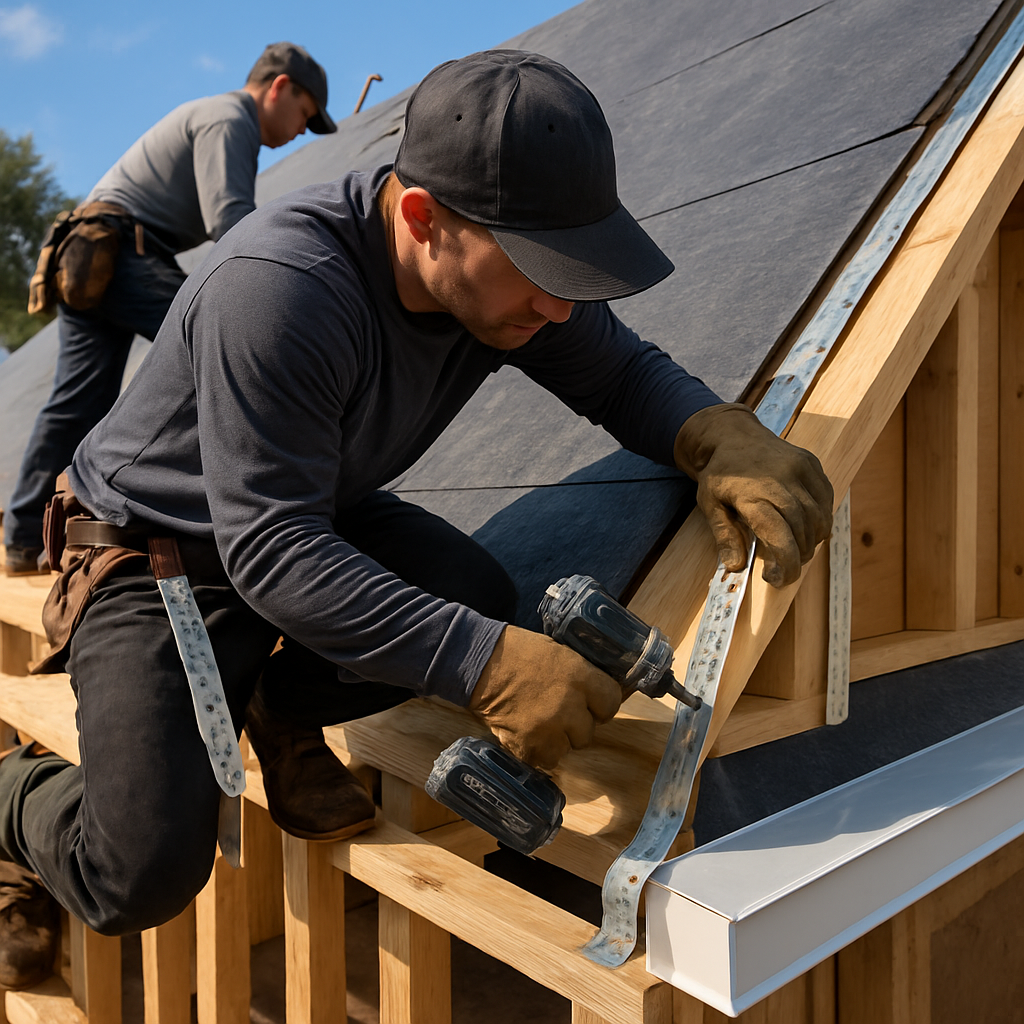
- Roof to wall connections: Install hurricane straps or clips tied into framing to prevent uplift and roof separation. These are inexpensive relative to the damage they prevent and often required for wind mitigation credits.
- Eave and rake edges: Replace or mechanically secure edge metal and flashings with through fasteners and back-up clips. Edge failures start roof loss and then expose the whole assembly to wind and water.
- Secondary water barrier: Install self adhered underlayment at eaves and full coverage underlayment under high wind zones. This keeps interiors dry when primary shingles or membranes lift.
- Sheathing and fastener repair: Replace delaminated sheathing and use ring shank nails or specified screws to increase withdrawal capacity. Rotten sheathing cannot be fixed with a coating or sealant.
- Perimeter and penetration reinforcement: Refasten or replace gutters, fascia, and rooftop penetrations; use continuous cleats or mechanical seals where possible to prevent tear off and water entry.
Trade off to accept. You will face three common constraints: access and cost for full deck replacement, local overlay limits that block certain retrofit methods, and insurance or code requirements that trigger full replacement if attachment ratings cannot be met. Where straps will not reach framing or sheathing is degraded, plan on replacement.
Concrete example: On a 1970s timber frame bungalow we retrofitted, adding hurricane straps at 6 foot centers along eaves and installing a continuous self adhered eave membrane reduced vulnerability substantially without a full tear off. Total cost ran near 30 percent of a replacement and the insurer applied a wind mitigation credit after documentation was submitted.
Sequence and execution matter. Do not apply a new coating or lowcost surface fix before confirming attachment and substrate integrity. The right sequence is inspect, remove failed edge materials, shore roof to wall connectors, then install secondary barriers and finish with coverings and coatings when appropriate.
Edge and connection fixes typically deliver the highest resilience per dollar spent
Final judgment. Targeted retrofits are the most cost effective resilience path only when the substrate and attachments are repairable. When multiple failure modes coexist – rotted sheathing, missing connectors, and multiple overlays – replacement is the prudent choice. If you want the insurer to recognize the upgrade, specify tested products, record installation, and refer to local approvals such as Miami Dade NOA where applicable.
Decision framework: repair, retrofit, or full replacement
Start with the roof's weak link. The single best predictor of whether to repair, retrofit, or replace is the condition of the substrate and attachments, not the surface covering. A roof that leaks but has sound sheathing and properly spaced fasteners can often be repaired or retrofitted; a roof with rotted sheathing, corroded fasteners, or multiple overlay layers usually needs full replacement to achieve meaningful wind resistance.
- Attachment condition: look for missing or short nails, spalled sheathing, or no continuous roof-to-wall connectors.
- Overlay limits and code: many jurisdictions and insurers disallow overlay beyond one existing roof; two layers typically forces replacement.
- Water and substrate integrity: extensive moisture intrusion or soft sheathing negates coatings and most retrofit benefits.
- Performance target: define required uplift rating (e.g., code wind speed or FORTIFIED target) up front — that determines whether fastener upgrades alone will suffice.
- Budget vs expected life: if repair costs approach 40–50% of a properly specified replacement, replacement is usually the better long-term choice.
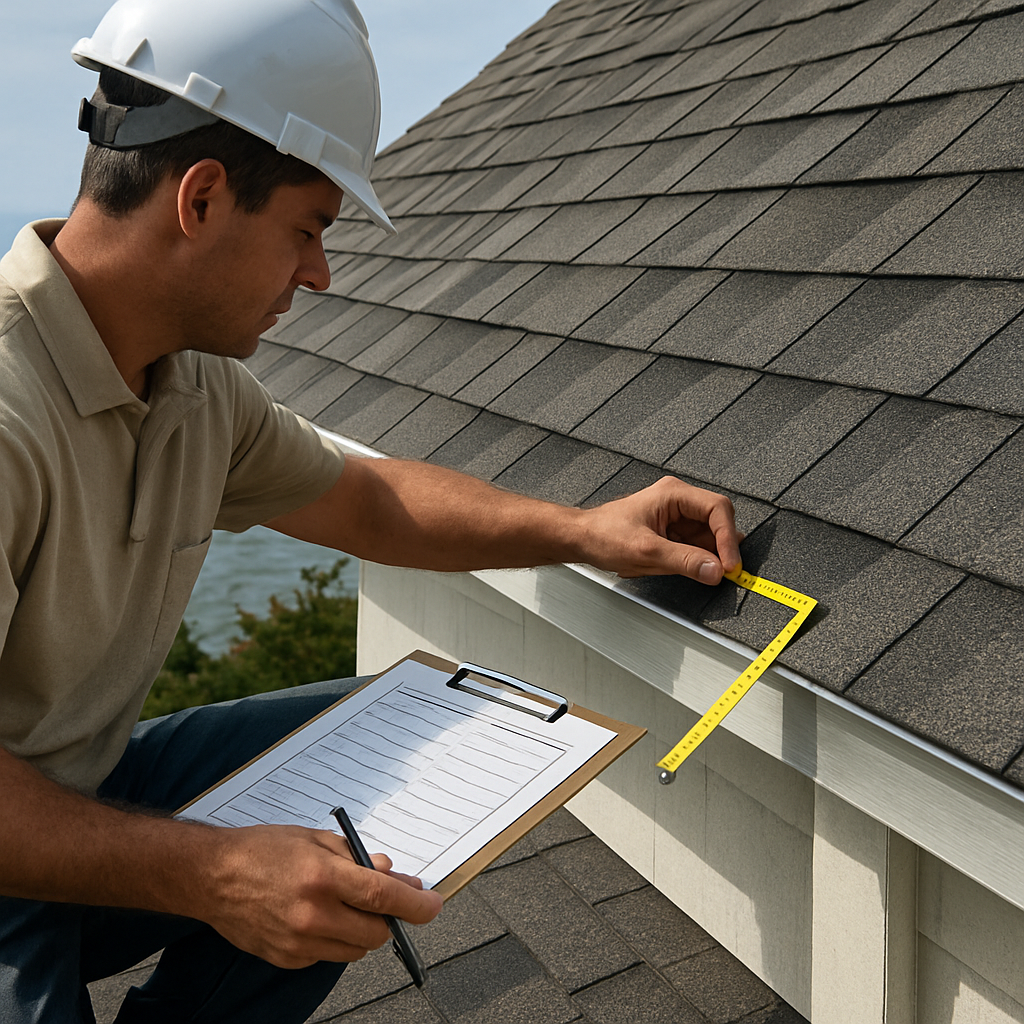
Assessment steps that produce a decision
Practical inspection workflow: perform a wind mitigation inspection, probe sheathing with a screwdriver in suspect areas, use a moisture meter under membranes, and sample fasteners at eaves and ridges. Document everything with photos, fastener counts, and written notes to support an insurance or code appeal.
- Confirm number of roof layers and underlayment condition.
- Verify presence and type of roof-to-wall connectors (straps, clips).
- Check perimeter metal, eave/rake attachments, and hip/ridge anchorage.
- Estimate remaining useful life of covering and sheathing.
Trade-off to accept: coatings and surface repairs buy time and reduce water intrusion cheaply, but they do not fix uplift capacity when the attachment system is the failure point. Spend on coatings when the substrate and fasteners are sound; spend on straps, re-nailing, or re-sheathing when they are not.
Concrete example: A 20-year asphalt shingle roof in Biloxi with curling shingles, torn edge metal, and localized soft sheathing. The recommended path was not a coating but a targeted retrofit: remove perimeter shingles, replace damaged sheathing, install a self-adhered secondary water barrier, add hurricane straps at roof-to-wall connections, and re-nail the eaves with ring-shank nails. That sequence raised uplift resistance enough to avoid full replacement for another decade.
Next consideration: ask contractors for two priced scopes: the minimum retrofit that addresses uplift (strap, edge, fasteners) and a full replacement spec that meets the target wind rating. Choose the option that demonstrably fixes the uplift failure mode documented in your inspection—not the cheapest quote that leaves the root problem unresolved.
Project execution, contractor selection, and verification
Start with a specification, not a price. Require a written scope that lists specific products, fastener types and spacing, coating thickness by wet mils and dry mils, substrate prep steps, and manufacturer warranty conditions. Bids that are vague about materials or omit installation milestones are a red flag.
Contractor selection: credentials that matter
Prioritize experience with high-wind work. Choose contractors who can show recent projects meeting Florida Building Code or Miami-Dade NOA approvals and who understand FORTIFIED or wind mitigation inspections. A roofer that installs coastal shingle and standing seam systems weekly will know the failure points that matter in a storm.
- Proof of relevant approvals: copies of Miami-Dade NOA product installs or manufacturer letters where applicable
- Documentation examples: before-and-after photos, anchor pull tests or fastener counts from completed jobs
- Insurance and licensing: general liability, workers compensation, and local contractor license numbers
- Installer training: factory certification for coatings or mechanically seamed metal systems when required
- References: three recent local projects in similar wind zones
What to ask during interviews. Ask for the exact fastener schedule, clip or strap model numbers, coating brand and SKU, and whether they will provide manufacturer-backed wind uplift or adhesion warranties. If the contractor cannot quote these specifics, they are not prepared for code-level hurricane proof roof work.
Contract terms, inspection milestones, and practical tradeoffs
Contract items to insist on. Include holdback for final acceptance, discrete milestones for substrate repairs and flashings, a list of required photos, and acceptance criteria for fastener pull tests or seam weld inspections. Require that coatings meet ASTM D6083 thickness and that shingle installations reference ASTM D7158 patterns when quoted.
Tradeoff to accept: speed versus documented quality. Rapid emergency repairs often sacrifice documentation that insurers and future buyers need. If you want insurance credits or resale value, plan for a controlled project with documentation rather than a quick patch.
Concrete example: A Gulfport homeowner replaced degraded fascia and upgraded eave attachments, then contracted a crew to install Simpson Strong-Tie clips at 6 feet on center, ring shank nails on shingles, and a 28 mil silicone coating on a low-slope porch roof. The contractor supplied Miami-Dade NOA equivalents for the metal flashing, provided time-stamped installation photos, and the homeowner used that documentation to obtain a wind mitigation credit with their insurer.
Verification, handover, and upkeep
- Pre-installation walkdown: record existing conditions, take photos of sheathing, penetrations, and attic signs of uplift or leaks
- Mid-project checks: contractor submits fastener counts, clip spacing photos, and coating mil-gauge readings before final coverage
- Independent inspection: use a qualified wind mitigation inspector or third-party to verify uplift measures and produce a signed form
- Handover package: require warranties, product data sheets, maintenance schedule, and all photos in dated folders
Verification matters for insurance and resilience: documented installations are what win wind mitigation credits and reduce post-storm disputes.
Next consideration: schedule the post-installation wind mitigation inspection and retain the contractor until corrections from that inspection are closed. For process guidance see IBHS FORTIFIED and FEMA building science. For contractor vetting, review local case studies such as Who Is The Best Roof Coating Contractor In Biloxi MS | FAQ.
Post-storm actions and routine maintenance to preserve hurricane resistance
Immediate priorities are safety, documentation, and limiting further water entry. After the storm, do not climb on a wet or damaged roof. Secure the site, photograph all visible damage from the ground and from safe vantage points, and log time-stamped notes before calling a contractor or filing a claim.
First 72 hours: triage checklist
- Safety first: keep people away from loose edge metal, dangling soffits, and exposed power lines.
- Photograph and map damage: take wide shots of the roof plane, close-ups of failed edges, missing fasteners, seam separations, and interior water stains. Photos are evidence for insurance and for planning repairs.
- Temporary leak control: install watertight tarps or plywood only when performed safely and per manufacturer guidance; avoid adhesive tapes that trap moisture against substrate.
- Triage temporary fixes vs permanent repairs: secure loose edge metal with mechanical fasteners only into sound substrate; do not overdrive screws into saturated sheathing.
- Call a qualified contractor: insist on documented inspection, an itemized scope, and photos showing repairs; ask whether repairs follow Miami-Dade NOA or manufacturer repair guidance.
Practical tradeoff: a quick tarp will stop interior damage but can void certain manufacturer warranties or complicate inspections if installed incorrectly.** Use temporary measures to prevent water entry, not as long-term fixes.
Concrete example: After a Gulf Coast storm, Expert Roofing inspected a commercial low-slope roof with seam peeling at the drains. They installed temporary mechanical clamps to stop blowout at the seams and cleared ponding to protect seams until a scheduled seam-weld repair and coating re-application could be performed. The photographs and contractor report shortened the insurer's approval process and prevented interior business interruption.
Routine maintenance that actually preserves the hurricane proof roof
- Quarterly visual inspections: check edge metal, fastener integrity on metal roofs, and flashings after any high wind event.
- Annual professional inspection: have a contractor verify fasteners, secondary water barriers, and membrane seam health; document with a signed report to support insurance.
- Gutter and drainage maintenance: clear leaves and debris so water does not pond; ponding accelerates seam failure on low-slope roofs.
- Re-coating schedule: follow manufacturer guidance (commonly 5–10 years for silicone systems); do small test patches before full recoat to verify adhesion.
- Targeted fastener maintenance: tighten or replace loose screws on exposed-fastener metal panels and replace split or rotted substrate rather than over-driving new fasteners.
A common mistake is over-fastening into compromised sheathing. Adding more screws looks proactive but can split saturated decking; cut out and replace damaged sheathing first, then reinstall the attachment pattern to wind-rating specs.
Insurance and verification: keep inspection reports, repair invoices, and photos in one file. Insurers favor documented wind mitigation and manufacturer-approved repairs; DIY quick fixes are frequently questioned during claims. For program-level guidance, reference IBHS FORTIFIED and FEMA building science resources when preparing documentation.