Roof Cleaning Services: Benefits, Costs, and How They Prevent Leaks
If your roof is streaked with algae or crowded with moss, roof cleaning services do more than freshen appearance—they reduce leak risk and slow material deterioration. This article explains how biological growth and debris create leaks on asphalt, metal, and tile roofs, compares soft wash roof cleaning with pressure washing and manual methods, and lays out realistic cost ranges and hiring criteria. You will also get practical maintenance schedules, safety and warranty pitfalls to avoid, and a short checklist for when to call local roof cleaning services or handle low-risk tasks yourself.
How biological growth and debris cause roof leaks
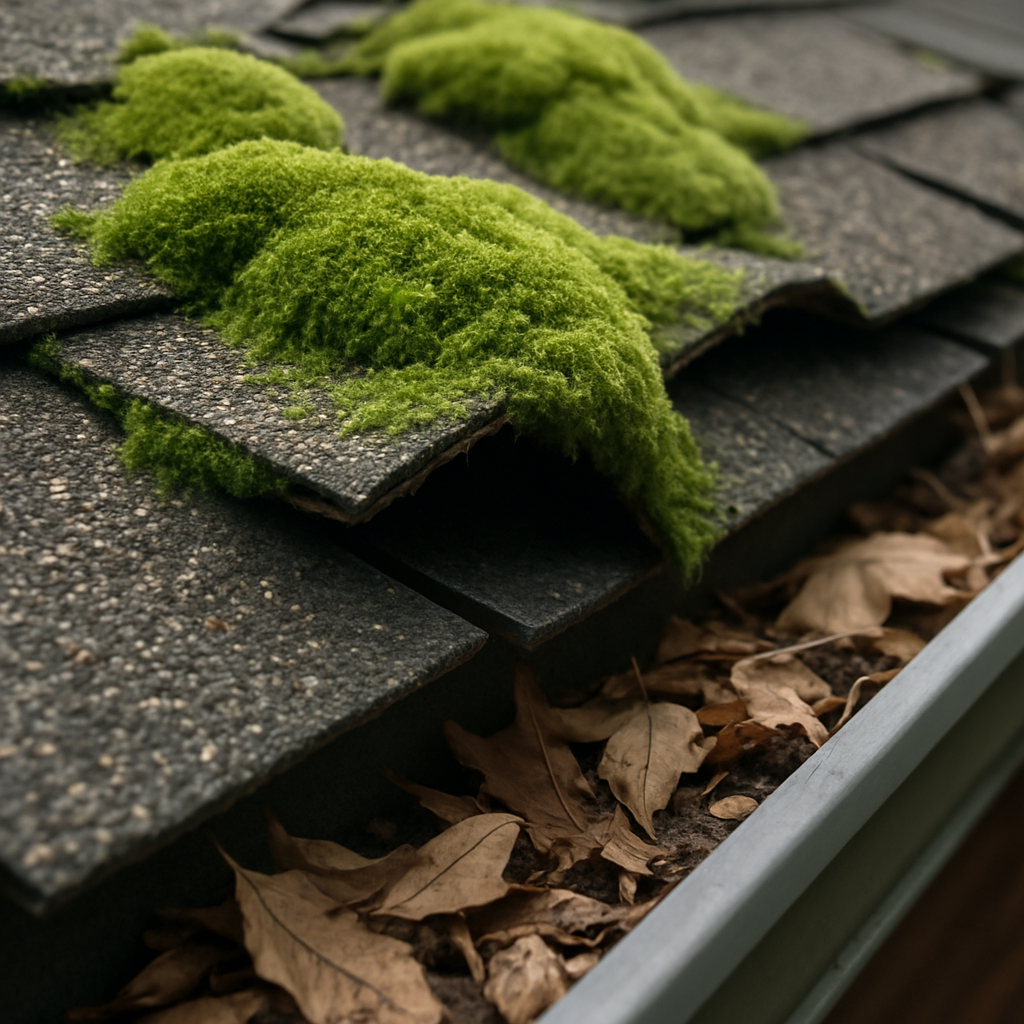
Direct mechanical damage: Biological growth and accumulated debris change how water runs across a roof and they physically pry materials apart. Moss and thick lichen work like tiny wedges under shingles and tiles, lifting edges so wind-driven water can reach the underlayment. Algae and black streaks may look cosmetic, but they retain moisture against shingles and accelerate granular loss on asphalt systems.
Asphalt shingle roofs: Moss lifts shingles and exposes the nailing zone; algae binds moisture to the surface and speeds UV degradation through granular loss. Soft wash roof cleaning removes organisms without the granule-stripping effect of high-pressure washing, but it will not reverse underlayment rot once water has penetrated beneath shingles.
Metal roofs: Organic debris in seams, valleys, and around fasteners traps moisture and acidic compounds from decaying leaves, which promotes corrosion at lap seams and screw heads. Pressure and thermal cycling then open corrosion pits into active leak paths; paint or coatings can hide this process until it is advanced.
Tile, slate, and cedar shake: Moss and lichen wedge under tiles and in mortar joints, redirecting flow and blocking valley drainage. On slate and clay tiles the problem is less about granular loss and more about displaced tiles and compromised underlayment where wedges concentrate point loads and freeze-thaw action breaks bedding mortar.
Secondary failure modes: Clogged gutters and blocked valleys cause ponding and elevated roof-edge moisture that undermines flashings and ends up at penetrations. Debris left in place accelerates decay of roof decks and fascia; cleaning that ignores gutter clearing or flashing inspection treats the symptom, not the pathway.
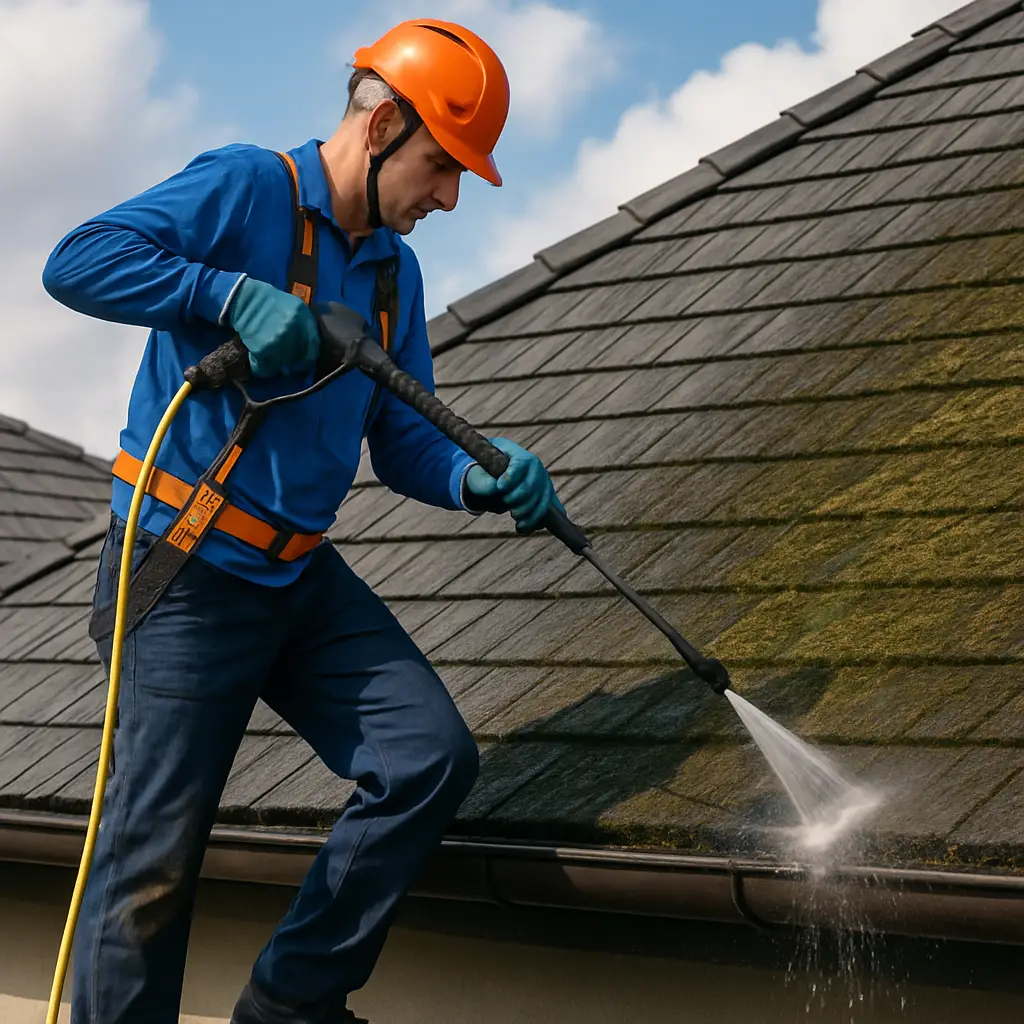
Trade-off and limitation: Aggressive mechanical removal removes growth quickly but raises the risk of breaking tiles or stripping shingle granules; no-pressure roof washing plus targeted manual removal around flashings is the pragmatic middle ground for most asphalt roofs. For metal, chemical-free brushing may be better than any pressure at all.
Concrete example: In a Pacific Northwest multifamily building, heavy moss along north-facing eaves lifted shingles and routed water beneath flashing; a subsequent inspection found softened underlayment over a 10 foot run and two interior leaks. The job required roof moss removal, localized underlayment replacement, and targeted roof waterproofing rather than cleaning alone — a common outcome where cleaning uncovers existing damage.
Next consideration: When planning roof cleaning services, prioritize a scope that includes gutter cleaning and a flashing inspection and link the work to repairs or coating prep as needed — see Expert Roofing roof-repairs and Expert Roofing roof-waterproofing for how cleaning fits into corrective work. For technical background on how growth affects materials, consult NRCA.
Roof cleaning methods and suitability by roof type
Match the method to the material and the damage you actually have. Choosing the wrong technique is the single most common cause of cleaning creating new problems: stripped shingle granules, broken tiles, and scoured paint on metal roofs all come from method mismatch, not poor execution.
Common cleaning methods – what they are, at a glance
- Soft wash/no-pressure roof washing: low-pressure application of a detergent/biocide mix to kill algae, moss, and lichen; rinsed off after dwell time. Best for fragile surfaces where detergent does the work, not force.
- Low-pressure rinse / controlled rinsing: brief, low-impact water flow to remove dead material after soft wash. Use as a finishing step, not the primary remover on heavy growth.
- Manual brushing and hand removal: physically scraping or lifting moss, re-setting tiles, replacing bedding mortar. Labor intensive but necessary where plant root mass has lodged under materials.
- Targeted pressure washing / power wash roofing services: only for durable substrates like concrete tile or some commercial membranes and when performed by specialists who control psi, nozzle, and angle.
- Steam or hot-water cleaning: useful where chemical runoff is restricted; kills organisms and loosens debris without high mechanical force, but needs specialized equipment.
Suitability by roof type and practical caveats
- Asphalt shingle cleaning: Default method is soft wash. Chemical treatment removes algae and prevents rapid granular loss that pressure can cause. Mechanical scraping is appropriate only around flashings where moss is physically lifting tabs.
- Metal roof cleaning: Avoid high-pressure on painted panels. Remove organic debris by brushing or low-pressure rinsing, then treat corrosion points and fasteners. Watch cleaner chemistry—strong alkalis can damage paint and coatings.
- Tile and concrete roofs: Selective pressure is acceptable but controlled. Clay and concrete tiles tolerate more force than shingles, but cracked or loose tiles must be hand-serviced first to avoid breakage and underlayment exposure.
- Slate roofs: Hand work and low-pressure chemical treatment. Slate is brittle; even modest pressure can cause fractures. Use biocide treatments and careful brushing around joints.
- Cedar shake roofs: Soft wash plus gentle brushing. Shakes are porous and susceptible to swelling and rot if over-wetted; minimize mechanical action and use biodegradable cleaners when practical.
- Low-slope/flat commercial roofs: Follow membrane manufacturer guidance. Some membranes allow light pressure cleaning, others require chemical or manual debris removal. Include gutter cleaning services for drainage issues.
Trade-off to accept: chemical-based soft wash kills and stabilizes biological growth but does not always detach the root-like holdfasts of heavy moss and lichen; where that material remains, selective manual removal is the only safe option. That extra labor raises cost but prevents repeat failures from hidden root mass.
Practical judgment: many property owners think pressure washing is the fastest, cheapest fix. In practice it often accelerates wear, can void manufacturer warranties, and shifts the cost to earlier repair or replacement. Spend more on the right method now and avoid paying to replace materials prematurely.
Concrete example: On a 12-unit townhouse complex with clay tiles, crews first hand-removed dense moss from north-facing eaves and reset several loose tiles. They followed with a targeted low-pressure rinse and a biocide application. The result was cleaned drainage paths and three avoided tile replacements that would have been required after a full-force power wash fractured adjacent tiles.
Next consideration: before approving any scope from local roof cleaning services, require a method statement that lists the cleaning technique, chemistry, containment measures for runoff, and confirmation the approach follows the roof system manufacturer or NRCA guidance.
Cost factors and typical price ranges for roof cleaning
Upfront reality: the price you see is a function of three things that are easy to miss — access complexity, the cleaning method required, and whether the scope includes repairs or runoff containment. These three drive most of the variance between an affordable weekend job and a licensed contractor quote that also carries liability, fall protection, and environmental controls.
Pricing models matter. Contractors quote by square footage, by pitch/height multiplier, or as a flat job rate. Per-square pricing simplifies budgeting for low-risk, one-story homes; flat or multifactored bids are more common on steep, tall, or commercial roofs because they bundle safety rigging, crew time, and waste handling.
| Scenario | Typical ballpark (unit basis) | What pushes cost up |
|---|---|---|
| Single-story residential, easy access, soft wash | $0.10–$0.45 per sq ft | Pitch >7/12, heavy moss, nearby landscaping protection |
| Steep or multi-story residential | 2–3× base per-square rate or flat premium | Fall protection, ladders or lifts, restricted work windows |
| Large commercial or multiunit | $0.05–$0.30 per sq ft (volume pricing) | Complex safety plan, permits, traffic control, RW runoff management |
Add-ons and hidden line items are real. Gutter cleaning, minor flashing repair, disposal of contaminated rinsate, and manual moss removal around flashings typically appear as separate line items. Expect to pay more where biocide containment, sediment traps, or street permits are required — these are not optional if you want contractor-level environmental compliance.
Practical trade-off: a low bid that uses high-pressure washing or skips containment may be cheaper up front but accelerates shingle wear and can create downstream costs from warranty disputes or landscaping damage. Pay for method compatibility and documentation instead of chasing the lowest number.
Concrete example: a three-story townhouse with steep asphalt shingles and mature landscaping required rope access, a soft wash application, and threaded containment mats for runoff. The job priced at roughly double the per-square baseline because of harnessed labor and sediment capture. The owner avoided a later warranty claim by getting a written method statement and MSDS for the cleaning chemicals.
How to compare bids: require an itemized estimate that lists unit rates, safety equipment charges, chemical names/MSDS, and whether gutter cleaning or minor repairs are included. If a contractor refuses to provide a method statement or insurance proof, treat their low price as a red flag. For baseline market context see the HomeAdvisor cost guide at HomeAdvisor Roof Cleaning Cost.
How professional cleaning prevents leaks and extends roof life
Straight answer: properly performed roof cleaning services stop common leak pathways before they start and buy time on the roof system, but only when cleaning is executed as part of a deliberate inspection-and-repair workflow rather than as a one-off cosmetic wash.
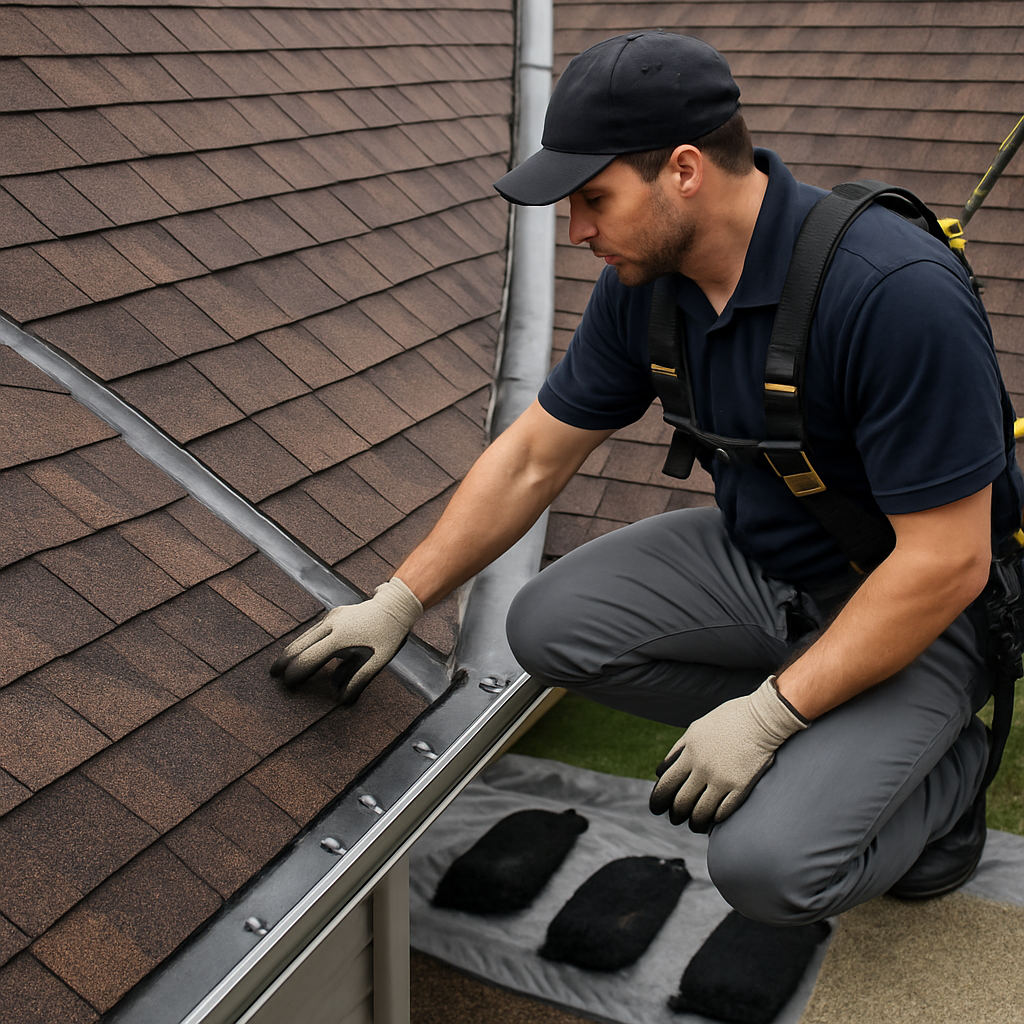
What cleaning actually fixes: professional crews remove the physical wedge action of moss and lichen at shingle and tile edges, eliminate biofilms that keep shingles damp, and clear debris that hides failed fasteners and clogged valleys. That restores correct drainage and reduces wetting cycles that break down underlayment and flashing seams.
Practical trade-off: cleaning makes latent problems visible. A soft wash will kill organisms and stop moisture retention, but it also exposes fasteners, underlayment rot, and failing flashings that were masked by growth. Expect some jobs to turn into immediate targeted repairs — that is an acceptable trade-off because fixing a 3 foot section of underlayment is nearly always cheaper than a full premature roof replacement.
Concrete example: a midrise office with an aging metal roof had recurring roof-edge leaks. After professional roof moss removal and a controlled low-pressure rinse, crews found corroded lap screws and rust at panel laps that were invisible under accumulated debris. Replacing dozens of fasteners and applying a localized coating at the laps stopped the leaks and deferred a full reroof for several years — cleaning unlocked a small, repairable intervention instead of an expensive replacement.
Sequence that delivers the outcome
Follow this order to convert cleaning into leak prevention rather than a cosmetic exercise.
- Inspect before you wash: document flashing, penetrations, and roof penetrations so cleaning does not mask defects.
- Choose the right method:
soft washfor asphalt, brushing for metal seams, and selective low-pressure for durable tiles. - Perform targeted repairs discovered during cleaning: fasteners, flashing seal, or underlayment replacement before any coating work.
- Use cleaning as prep for coatings/waterproofing: a clean surface improves adhesion and extends coating life; see Expert Roofing roof-coating.
Judgment you need to make: if a roof shows heavy biological colonization accompanied by soft spots or visible flashing gaps, budget for both cleaning and a contingency for repairs. Conservative property managers treat cleaning as a diagnostic investment that surfaces low-cost fixes rather than as an optional cosmetic expense. For best practice guidance and industry standards, consult NRCA.
Next consideration: when you request bids from local roof cleaning services, require a pre-clean inspection report and an explicit line item for discovered repairs so cleaning becomes a predictable risk management action, not a surprise expense.
Safety, environmental, and warranty considerations
Hard reality: most expensive outcomes from roof cleaning are not roof failures — they are safety incidents, environmental fines, and denied warranty claims. Treat a cleaning contract as a safety and compliance project first, an aesthetic job second.
Fall protection and on-site controls
Must-have evidence: require a written fall protection plan and proof of crew training before work starts. For work above 6 feet, OSHA rules apply — anchor points, harnesses, lanyards, and rescue plans matter on two-story and commercial jobs (OSHA Roofing).
Relying on ladders and ad-hoc scaffolding is how crews get hurt and how owners pick up liability. For steep or multiunit roofs insist on rope access credentials, lift certifications, or engineered temporary anchors; accept no shortcuts on harnessing, tool tethering, and exclusion zones.
Containment, runoff, and chemical handling
Practical containment: simple rinsing without traps creates both environmental risk and property damage. Local stormwater rules vary — some municipalities treat untreated rinsate as hazardous waste when concentrated biocides are used.
- Sediment controls: deploy silt socks, trench drains, and sediment basins at roof edges to capture solids before street or storm drains.
- Plant protection: shield landscaping with tarps and neutralize overspray where sodium hypochlorite may contact foliage.
- Chemical documentation: request MSDS sheets and a rinsate disposal plan; avoid contractors who claim rinsate can simply be dumped to lawn or gutter.
Trade-off to accept: stronger biocides clean more thoroughly and reduce repeat visits, but they require stricter containment and documented disposal. If the site is sensitive — schools, commercial kitchens, or stormwater-limited areas — prefer steam or physical removal despite higher labor costs.
Warranty and insurance pitfalls
Warranty risk: many shingle and membrane manufacturers will void coverage if high-pressure washing or incompatible chemicals are used. Ask the contractor to confirm the proposed method is consistent with the roof system manufacturer and to provide that confirmation in writing.
Insurance proof: require current general liability and workers compensation certificates naming the property owner as an additional insured for the job. Without them you inherit financial risk if a worker falls or landscaping is damaged.
Concrete example: an HOA hired a low-cost crew that power-washed an asphalt shingle roof. The wash stripped granules, the manufacturer denied a later leak claim, and the HOA paid to replace damaged sections plus landscape remediation. The small upfront saving became a six-figure problem for that board.
Next consideration: tie acceptance of the job to a documented pre-clean inspection and a signed method statement so cleaning becomes a controlled maintenance action rather than an exposure event. For contractor vetting and how cleaning integrates with repairs, see Expert Roofing roof-repairs and consult NRCA for industry standards.
DIY cleaning checklist and criteria for hiring a professional
Practical rule: handle only what you can do from the ground or a stable ladder and only when biological growth is light, no active leaks exist, and local runoff rules allow it. DIY saves money but transfers all safety, environmental, and warranty risk to the owner.
DIY cleaning checklist
- Start with inspection and documentation: walk the property perimeter, photograph roof elevations and gutters, note soft spots you can see from the ground.
- Clear low-risk debris: remove leaves and sticks from gutters and downspouts using a gutter scoop or gloved hand while standing on a stable ladder; do not climb onto steep roofs.
- Choose the right product and applicator: use a labeled soft wash solution approved for your roof material and a pump sprayer with an extension wand so you can treat from the ground or a safe ladder height.
- Protect landscaping and drains: cover sensitive plants and install sediment socks at storm drains; neutralize overspray according to the product MSDS.
- Rinse gently and only as required: use a low-volume garden hose with a wide spray pattern or an extension rinse to avoid mechanical damage; do not pressure wash asphalt shingles.
- Photograph after work and keep records: capture before/after photos, save product labels and MSDS, and note any areas that need a pro for follow up.
Limitation and trade-off: soft wash chemicals kill organisms but may not loosen heavy moss holdfasts. Expect to call a contractor if root mass remains or if you find areas where flashing, underlayment, or fasteners appear compromised. Attempting aggressive mechanical removal yourself risks breaking tiles and voiding warranties.
When to hire roof cleaning services instead of DIY
- Steep, multi story, or awkward access: any roof you cannot safely reach with a stable ladder and fall protection.
- Extensive moss, lichen, or soft spots: heavy biological colonization or visible deck deflection that indicates hidden damage.
- Active leaks or interior water stains: cleaning alone will not fix structural failures that require diagnostic repair.
- Complex drainage or regulatory constraints: jobs near storm drains, public sidewalks, or sensitive landscaping that need engineered containment and permits.
- Warranty sensitive systems or coating prep: when manufacturer compliance or certified cleaning is required for future coating or warranty work; see Expert Roofing roof-coating for how cleaning fits into coating prep.
What to demand from a contractor: a written method statement with chemistry and containment plans, evidence of fall protection training, current insurance certificates, itemized pricing that separates cleaning from repairs, and before/after documentation. Contractors that refuse these items or give verbal assurances only are not worth the low bid.
Concrete example: A homeowner with a single-story bungalow used an extension sprayer from ground level, applied a biodegradable soft wash, and protected shrubs with tarps; the cleaning removed black streaks and required no follow-up repairs. By contrast, the same neighborhood had a three-story residence where heavy moss hid flashing failures; a pro discovered underlayment rot during the pre-clean inspection and scheduled repair work before any chemicals were applied.
Require a signed pre-clean scope and post-clean report so cleaning becomes a documented maintenance action rather than an undocumented risk.
Next consideration: if you attempt DIY, set a strict rule to call professional roof cleaning services when any structural concern appears during your inspection or if containment would cross public drains — the small upfront contractor cost avoids warranty disputes and environmental liability.
Maintenance frequency, ROI, and sample lifecycle plans
Maintenance should be trigger-driven, not calendar-driven. Use visible conditions and risk factors to set frequency: shade, roof material, drainage performance, and history of biological regrowth are the controls you tune — not an arbitrary year number.
Risk bands and inspection triggers
Start with inspections tied to risk. For any roof, schedule a documented walkaround or drone survey after the high-growth season and again after major storms. Trigger a professional scope when you see any of the following: persistent streaking that returns quickly after a wash, moss or lichen visibly lifting edges or ridges, repeated gutter clogging from roof-shed debris, or any soft spots felt on attic access. These triggers are better predictors of needed cleaning and repairs than a fixed year interval.
Practical limitation: if you rely solely on visual cleanings from the ground, you will miss early flashing failures and fastener corrosion. Inspections must include a targeted surface check by a trained technician at least once between major cleaning events to catch issues that cleaning alone cannot fix.
| Lifecycle Phase | Typical Actions | Decision Trigger / Outcome |
|---|---|---|
| Phase A – Baseline (New or Recently Repaired) | Record roof type, photos, manufacturer requirements; install basic drainage controls (gutter guards, leaf traps). | Trigger next step if initial inspections show biological buildup or drainage restriction. |
| Phase B – Monitoring | Quarterly visual checks from ground, semi-annual gutter cleaning, seasonal roof-edge inspection, document changes. | Trigger professional cleaning when persistent growth or blocked drainage appear. |
| Phase C – Cleaning + Minor Repairs | Perform method-appropriate cleaning (soft wash for shingles), hand-remove lodged moss, replace or seal small flashing/fastener issues. | If repairs uncover underlayment or wide-area corrosion, advance to evaluation for coating or partial replacement. |
| Phase D – Coating / Waterproofing Prep | Intensive cleaning as coating prep, targeted repairs, adhesion testing, then apply coating or waterproofing if substrate is sound. | Coating proceeds only when cleaning produces a stable, adherent surface and repairs have addressed leak pathways. |
| Phase E – End-of-Life Decision | After repeated repairs or when substrate condition declines, budget for partial or full replacement; cleaning continues as interim protection. | Replace when repair costs and lost life exceed expected value of renewal; use documented cleaning history to support the decision. |
ROI judgment call: cleaning is most valuable when it reveals small, fixable faults and when it delays broad replacement by enabling targeted repairs or successful coatings. If cleaning only uncovers large-area underlayment failure or advanced corrosion, the ROI flips and replacement is the better investment.
Concrete example: a 40,000 square foot warehouse with a painted metal roof implemented quarterly visual checks and annual low-impact cleaning focused on seams and fasteners. During the second-year cleaning crews discovered early corrosion at several lap screws; they replaced fasteners and applied a local lap coating. The owner avoided an expensive partial reroof in year three because the intervention at cleaning time stopped the corrosion progression.
Next consideration: when you draft a lifecycle plan, tie cleaning events explicitly to inspection reports and to any future coating or waterproofing work — see Expert Roofing roof-coating and Expert Roofing roof-waterproofing for how cleaning should be scoped as prep rather than a standalone cosmetic service.