Siding Service vs Roof Waterproofing: When to Repair, Replace, or Protect Your Building Envelope
When water stains, peeling paint, or recurring leaks appear, deciding whether to call for a siding service, pursue roof waterproofing, repair the wall assembly, or replace components is more complex than it looks. This article gives a practical, inspection-based framework that separates signs tied to cladding versus roof failures, sets measurable thresholds for repair, replace, or protect, and lays out realistic cost and lifespan tradeoffs. Use the checklists and sample scenarios to prioritize work, avoid repeat fixes, and make defensible capital decisions for homes or commercial properties.
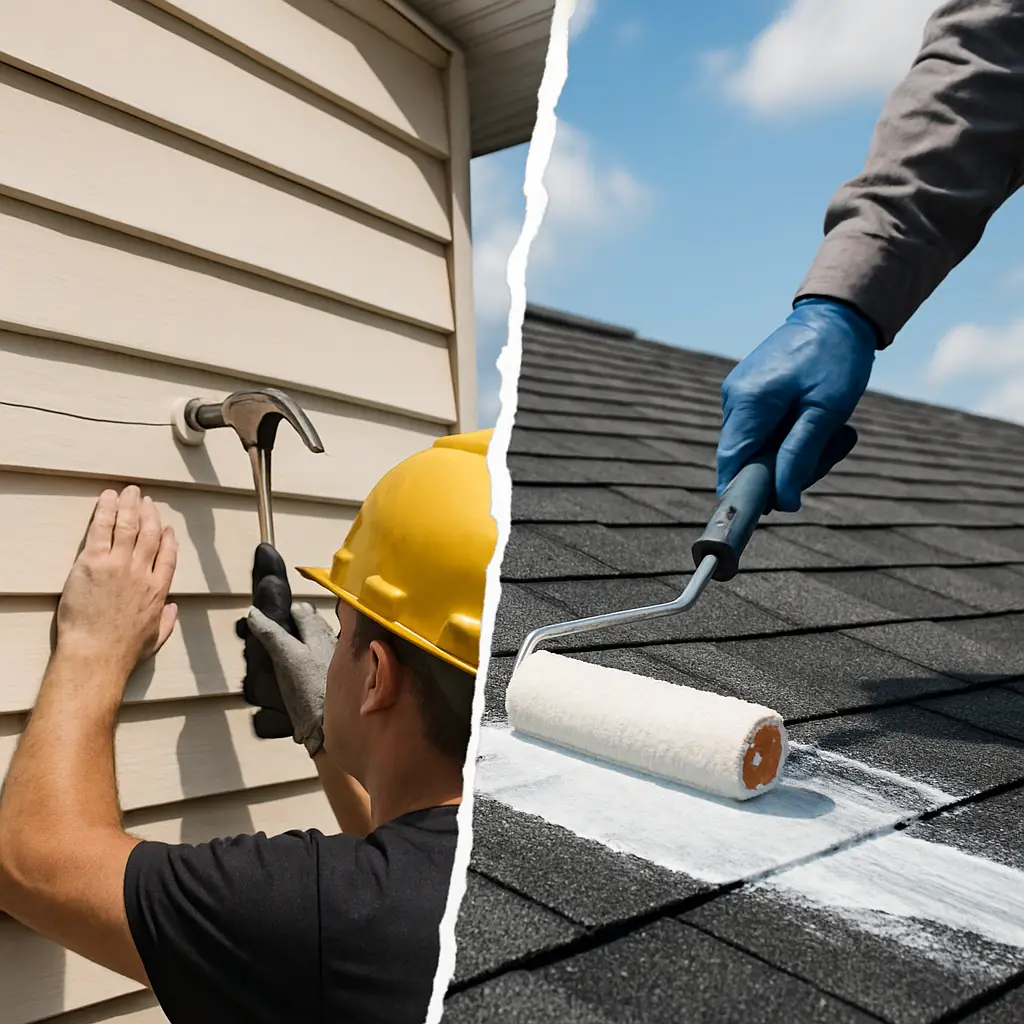
How siding and roof systems interact in the building envelope
Key point: Failures almost always show up at the seam between systems. The exterior cladding, the sheathing beneath it, the roof cover, and the flashing at their junctions form a layered defense. If any layer is breached or installed without continuity, water finds a path into the wall cavity or attic.
Practical insight: Paying for a siding service alone is often wasted money when flashing or roof details are the real problem. Conversely, applying a roof waterproofing treatment without confirming wall flashing and cladding integrity routinely leads to recurring leaks. Fix the weakest link, not the most visible surface.
Common interfaces and how they fail
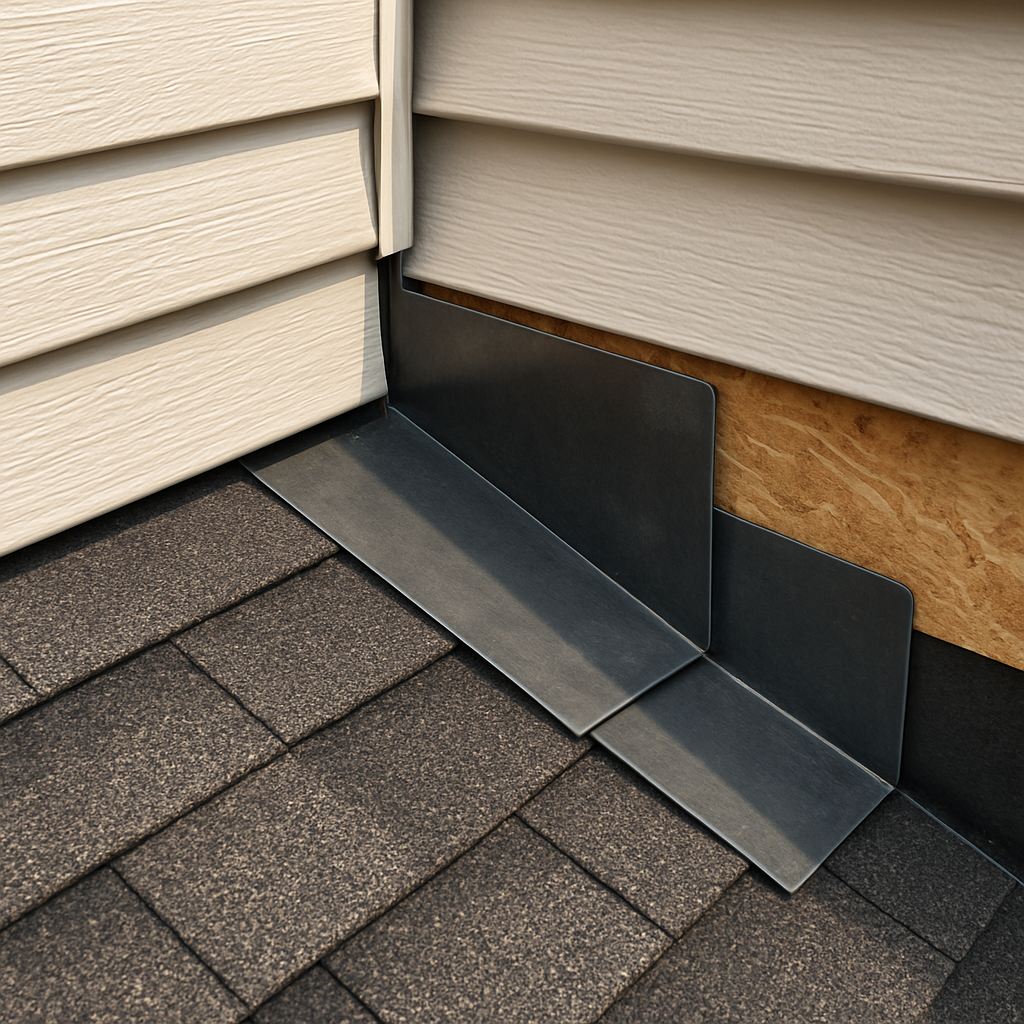
- Eave and rake intersections: Missing or improperly lapped step flashing lets shingle runoff enter the siding head. Check for gaps where siding overlaps flashing.
- Roof to wall apron: A continuous apron or counterflashing is rare in sloppy installs. Water can back up under siding courses during wind driven rain.
- Chimneys and dormers: Complex profiles mean lots of flashing terminations and sealant. Sealant ages faster than metal; inspect laps and counterflashings.
- Parapets and copings: Cap detail failures allow bulk water into the top of wall assemblies. Look for deteriorated sealant and corroded caps.
- Window and door heads: Missing head flashings or caulking failures focus water into the lowest courses of siding and into the sheathing.
Water flow sketch: Roof runoff -> step flashing -> gap at siding lap -> sheathing -> cavity illustrates a common path. A second common path is Parapet cap failure -> top plate wetting -> interior staining.
Reference: For field guidance on flashing and roof-wall transitions see NRCA technical resources and practical assembly details at Building Science.
Concrete example: A two story house with vinyl siding and asphalt shingles had repeated stains on the second floor ceiling. Inspection found step flashing not lapped under the siding over a 12 foot run. The repaired scope included reinstalling stainless steel step flashing, replacing two rows of rotted sheathing, and limited siding replacement which cost more up front but stopped repeat repairs and protected the attic insulation.
Judgment: Coordinate trades on every roof to wall intervention. Replacing siding without correcting flashing or roof edge details is a band aid. Spending 10 to 20 percent more on coordinated flashing and sheathing repairs up front prevents multiple callbacks and protects warranties.
If water is showing near a roof to wall junction, treat the junction as the primary suspect until proven otherwise.
Inspection checklist: how to diagnose whether the problem starts with siding, roof, or wall assembly
Start with symptom mapping, not cosmetic fixes. Walk the building and mark every staining, soft spot, and active drip; the spatial pattern is the single best clue to origin because water travels along predictable paths before it shows up on finishes.
- Map interior stains: Draw the stain footprint on a floor plan or photo, note height above finished floor and distance from roofline or windows, and record when stains appear relative to storms. If multiple ceilings under one roof slope are wet, suspect roof or roof-to-wall flashings.
- Inspect the attic and top plates: Use a flashlight and ladder. If insulation or sheathing is wet directly above the stain, the problem usually enters above the ceiling; if the ceiling cavity is dry but exterior cladding near the stain is wet, the wall assembly is implicated.
- External quick scan: From the ground and via ladders where safe, look for loose or displaced cladding, failing sealant at penetrations, and recent patches. Do not assume visible damage equals source; record locations precisely.
- Non destructive testing: Use an infrared camera to find thermal anomalies and a non-invasive moisture meter to survey sheathing. Infrared is useful for timing inspections during or just after a rain event; it can miss moisture behind dense insulation.
- Targeted invasive checks: Where tests point, probe sheathing edges and cut a 2 by 2 inch inspection hole behind suspect siding or at the roof-wall junction to confirm rot, mold, or active leakage paths. This costs little compared with repeated, misdirected siding service work.
- Controlled water test: For ambiguous exterior gaps, perform a hose test from low to high or replicate wind direction while an observer watches inside. Hose testing should be documented and staged up a wall so you can isolate flashing laps and window heads.
- Flashings and gutters: Inspect step flashing terminations, counterflashing at parapets and chimneys, and gutter overflow points. Small failures at these details cause disproportionate interior damage.
- Synthesize findings: Combine mapped stains, attic observations, moisture readings, and invasive checks to assign probability: >70 percent roof origin, >70 percent wall origin, or mixed. If mixed or uncertain, schedule a coordinated trades assessment.
Tools, participants, and who should do what
Inspector roles matter. A qualified building inspector or experienced roofer should do the roof and flashing checks; a siding specialist or carpenter should do cladding and sheathing probes. Do not let a single-trade contractor declare a siding replacement when moisture readings implicate flashings.
Toolbox essentials: IR camera for screening, non-invasive and pin moisture meters, ladder binoculars, small rotary saw for inspection cuts, hose and nozzle for controlled tests, and a camera to document findings for warranty or insurance claims. If you lack equipment, hire a contractor who will produce time-stamped photos and meter logs.
Practical tradeoff: Non-destructive scans reduce unnecessary demo but have limits; invasive checks give certainty but create small repairs. Choose a hybrid: scan first, then three or four targeted cuts to confirm the most likely entry points before approving broad siding service or roof work.
Concrete example: On a midrise retail building with TPO roofing and cladding panels, an occupant reported intermittent ceiling stains. An IR scan during a post-storm inspection showed warm linear runs at the parapet; a hose test over the parapet cap reproduced the leak. The team cut two small inspection holes at the parapet top and found failed mastic and saturated blocking; the fix was targeted parapet reflash and selective siding panel replacement rather than wholesale cladding replacement.
Final judgment: Before commissioning a siding service or roof waterproofing, require a documented diagnostic sequence: mapping, non-destructive scans, targeted invasive confirmation, and a recommended scope that addresses both visible cladding and the underlying flashings or membrane when implicated.
When to choose siding service: repair versus replace criteria by material
Direct rule: choose a siding service when the failure is limited to the cladding and the substrate and flashings are intact. If sheathing is wet, fasteners are loose, or flashing at roof-wall intersections is failing, a siding-only fix is a gamble. The decision must hinge on substrate condition and the spatial extent of damage, not just visible cracks or fading.
| Material | When to repair (reasonable) | When to replace (recommended) | Typical cost range per square foot | Practical note |
|---|---|---|---|---|
| Vinyl siding | Localized cracks, single-panel warping, loose trim; sheathing dry and fasteners sound | Widespread buckling, thermal shrinkage across many elevations, or brittle, sun-degraded panels affecting >30 percent of facade | $2.00 – $6.00/sq ft (materials and labor vary regionally) | Seamless replacement panels are limited; color and profile matching can force larger runs. |
| Fiber cement (e.g. James Hardie) | Small chips, isolated nail pops, single-board fracture with dry substrate | Delamination, board swelling, or more than ~30 percent of boards showing bond failure or substrate rot | $4.00 – $10.00/sq ft | Follow James Hardie installation guidance for proper fastener spacing and flashing to avoid repeat failures. |
| Wood siding | Patch and splice for localized rot, insect damage, or paint failure where framing and sheathing are sound | Multiple adjacent bays with rot or active fungal growth, or chronic moisture across elevations | $6.00 – $12.00/sq ft (species and finish drive cost) | Wood tolerates repairs poorly where moisture cycles continue; replacing the assembly is often cheaper long term if wetting is chronic. |
| Masonry veneer / Brick | Tuckpoint mortar joints, replace cracked units, repair flashing and through-wall ties | Extensive spalling, failed headflashings, or continuous leakage indicating failed substrate or cavity system | $8.00 – $20.00/sq ft | Distinguish cosmetic mortar failure from through-wall leakage; invasive inspection may be required. |
| Aluminum / Metal siding | Dent and seam repairs, reseal fasteners, localized panel replacement | Corrosion across multiple panels, failed backer causing oil-canning, or loss of coating over large areas | $5.00 – $12.00/sq ft | Coating systems can be recoated in some cases, but corrosion undercutting fasteners mandates replacement. |
Tradeoff to be explicit about: repairing cladding is cheaper short term but raises the risk of repeat work if the wall assembly or roof-wall flashings remain flawed. Conversely, full replacement is more capital intensive but can eliminate hidden substrate repairs and simplify warranty coverage. Use a cost-per-remaining-year calculation to compare options rather than only upfront cost.
Field case: On a three unit multifamily property with vinyl siding, one elevation showed a string of warped panels after ice damming. Moisture meters read low and sheathing was dry, so crews replaced the affected panels and corrected gutter pitch. The customer avoided a full reclad and the repeat leak risk because the flashing, gutters, and sheathing were verified before approving the siding service.
Professional judgment: the most common misstep is approving a siding replacement without verifying flashing continuity at roof edges and windows. When a contractor recommends full replacement, ask for moisture logs, inspection holes, and a plan for flashing correction. If they cannot provide those, treat the quote as incomplete and consider a combined siding and roofing assessment via Expert Roofing contact.
Next consideration: before signing a work order, insert a sheathing contingency line item and require documented repairs to flashings and drip edges. That single contract clause prevents cosmetic siding service from becoming a recurring expense.
When to choose roof waterproofing or coating: repair versus protect thresholds by roof type
Clear rule up front: apply a roof coating to protect a largely intact system, not to repair fundamental breaches. Coatings are a life-extension and maintenance strategy; they are not a substitute for fixing failed seams, degraded flashings, or saturated decking.
Low-slope single-ply membranes (TPO, PVC, EPDM)
Thresholds for protection: suitable when the membrane has widespread adhesion, seams are intact or can be re-taped, and there are no persistent ponding locations that exceed the acceptable drain times for the membrane system. If you see multiple seam failures, recurrent patched areas, or substrate soft spots, plan for reflash or replacement rather than a blanket coating.
- When coating makes sense: membrane age approaching but not beyond expected life, limited single repairs needed, good attachment to substrate, and positive drainage.
- When replace is required: cumulative seam breaches, more than a handful of prior repairs clustered in the same field, or soft insulation/decking under the membrane.
- Practical note: coatings (silicone or acrylic) bond poorly to contaminated surfaces; rigorous surface prep and supplier-approved primers are mandatory.
Asphalt shingle and steep-slope systems
Practical boundary: most shingle roofs are not candidates for traditional membrane coatings. Use specialized rejuvenators only on marginal shingle conditions — not when flashing or underlayment has failed. Replace when shingles are severely curled, granules are gone across large areas, or underlayment has exceeded its useful life.
Standing seam and through-fastened metal roofs
Decision pointers: metal roofs benefit from coatings when the substrate is structurally sound and corrosion is surface-level. If fastener backs are corroded, panels are distorted, or the roof has multiple failed lap seams, replace affected panels or resecure fasteners before coating. Coating over active corrosion or loose fasteners delays inevitable failure.
Trade-off to note: coatings are lower initial cost and fast to deploy, but they can mask slow-developing problems. That makes inspection and documentation essential before and after application — otherwise you buy cosmetic quiet, not true risk reduction.
Real-world application: A small commercial strip center with an aging TPO had isolated seam blisters and good overall membrane adhesion. The team re-taped and re-flashed the blistered seams, replaced 10 percent of insulation, then applied a silicone coating to the whole roof. The combined approach avoided a full replacement and eliminated repeat leaks for several seasons because the weak points were addressed first.
Judgment: if the roof has repeated, clustered repairs or flashing failures, a coating will delay replacement only briefly and often complicates later reroofing. Prioritize fixing attachment, seams, and drainage first; use coatings as a calculated, documented extension of service life where the substrate and details are sound.
Next consideration: before approving a coating bid, require the contractor to deliver a pre-application inspection report, a list of repaired details with photos, and a statement from the coating manufacturer that the substrate repairs meet product warranty conditions.
Decision framework: repair, replace, or protect using measurable criteria
Start with quantifiable inputs, not gut feeling. Base the repair versus replace versus protect choice on measurable factors: proportion of façade or roof area affected, count of independent leak locations, an evidence-based remaining useful life estimate, active warranty constraints, and the annualized cost of the proposed scope.
Core decision inputs
Core metrics to record: For each suspect elevation or roof field write down (1) percent of area showing damage, (2) number of distinct leak or wetting points, (3) sheathing or deck condition (dry, stained, softened), (4) estimated years left if no intervention, and (5) prior patch history. Capture photos and meter logs tied to those numbers.
- Repair (targeted siding service or roof patch): Use when the affected area is small (under ~15 percent of an elevation or under a handful of roof patches), substrate is sound, and repairs restore continuous flashing or membrane detail. This is the lower initial cost option but often gives only short-term relief if underlying details are ignored.
- Replace (siding or roof replacement): Choose when damage is widespread (over ~40 percent of the surface), multiple separate leak locations exist, sheathing or deck shows structural deterioration, or estimated remaining life is under 5 years. Replacement raises upfront cost but lowers the risk of repeated emergency repairs and simplifies warranty coverage.
- Protect (coating or proactive siding treatments): Appropriate when the system is largely intact, flashings are serviceable, and a verified remediation of isolated failures is performed first. For roofs, require membrane continuity of at least 70 percent adhesion and acceptable drainage before approving a coating. Coatings buy time; they do not fix failed flashings or saturated decks.
Practical tradeoff: Repair is cheaper today; replacement is cheaper per year when the repaired system has only a short remaining life. Always compute the annualized price: total cost divided by expected added service years to reveal which choice is cost-effective over the time you intend to own the asset.
Concrete example: A single-family home with a leaking roof valley and localized vinyl siding damage had two bid options: repair flashing and replace 10 square feet of siding for $2,500 (estimated 2 more years of trouble) or replace the valley, underlayment, and reclad that wall section for $8,500 (estimated 12 years additional service). Annualized cost: repair = $1,250/year; replace = $708/year. Replacement is the rational choice for an owner planning to hold the house more than three years.
Judgment: If metrics point different directions (for example small area affected but very low remaining life), prefer the option that lowers lifecycle cost and removes unknown failure modes, not the cheapest sticker price.

Next consideration: Require contractors to deliver the metric log used to reach their recommendation and tie payment milestones to verifiable remediation of flashing, sheathing, or drainage issues. If you are weighing a protective coating, get a pre-application report and a written manufacturer warranty condition from the installer via roof waterproofing.
Integration details that cause repeat failures and how to fix them
Immediate point: most repeat leaks are integration failures – not material failures. When trades hand off work without agreed interfaces, water finds the gap where materials meet, move, or corrode.
Practical insight: fix sequencing and acceptance criteria matter as much as the product chosen. A correct roof coating, premium siding, or high end flashing will still fail if installers do not document dry-in, membrane termination, and cladding lap acceptance before closing the wall.
Common integration failure patterns and the specific fix
- Flashing terminated on top of cladding instead of under it: Rework to extend a self-adhered membrane up the wall 4 to 6 inches, install stainless step flashing lapped a minimum of 2 inches under the siding course above, and fasten into framing not just sheathing.
- Sealant mismatch and reliance on caulk as primary defense: Use mechanical flashing for primary exclusion; reserve neutral-cure elastomeric sealants for joints, and specify compatibility testing with the substrate – do not rely on generic silicone to bridge movement.
- Gutter capacity and overflow behind cladding: Upsize or re-route gutters, add scuppers or overflow leaders at parapets, and extend downspouts away from the foundation. Ensure gutter attachments do not pierce critical membranes unless flashed and sealed.
- Dissimilar metal contact and corrosion where roof metal meets siding trim: Isolate metals with non-conductive washers or stainless steel fasteners and specify compatible coatings to avoid galvanic failure that opens paths for water.
- Thermal and structural movement ignored at transitions: Provide slip joints or flexible counters in long runs and detail movement joints at 20 to 30 foot intervals for metal and fiber cement systems.
Trade coordination requirement: require a pre-install mock-up and a dry-in sign-off. The mock-up proves that flashing termination, membrane continuity, and siding attachment work together under field conditions – and it creates a documented standard the rest of the facade must meet.
Specification language you can copy into contracts: Self-adhered flashing membrane to extend 4 inches minimum onto vertical sheathing, 3 inch lap over each flashing course; stainless steel step flashing, 0.7 mm minimum, lapped 2 inches under siding; fasteners to penetrate structural framing by 1 inch and be stainless or hot-dip galvanized per ASTM. Require photographic proof of each installed lap before covering.
Concrete example: On a six unit townhouse complex, repeated second-floor stains were traced to gutters that overflowed behind the siding during rapid snowmelt and to a contractor who had lapped flashing over, not under, the cladding. The corrective scope removed affected siding, installed continuous self-adhered WRB up the wall, rehung stainless step flashing under new siding, upsized gutters, and added downspout extenders. The upfront cost was higher but callbacks stopped and interior drying prevented mold remediation costs.
Integration fixes usually add 10 to 30 percent to the visible scope but cut lifecycle cost and callbacks more than they increase upfront budget.
Judgment: owners and facility managers should treat integration work as capital prevention, not cosmetic extra. Expect some extra cost and schedule time for sequencing – that is the point. If a contractor resists mock-ups, documented laps, or manufacturer sign-off, hire one who accepts those checkpoints. Next consideration – make acceptance criteria part of the scope so the fix addresses the joint, not just the visible surface.
Real life examples and case studies
Straight observation: real projects prove that the right decision rarely follows a single visual cue. Practical choices come from layering diagnostic evidence with operational constraints—cost, occupancy, and timeline—and then picking the option that removes the root cause, not just the visible symptom.
Case 1 — Owner-occupied bungalow: cedar siding, ice dams, and attic rot
What happened: heavy winter ice dams caused repeated water to track under the rake shingles and run down behind cedar shingles. The owner had three siding service quotes to replace long runs of cedar; none documented attic moisture or corrected roof eave details. Resulting judgment: crews replaced siding, but the leak returned within a season because the eave flashing and attic ventilation were unchanged.
What worked: a targeted scope that first replaced damaged fascia, installed ice-and-water protector under the first two roof rows, corrected ventilation, and then replaced only the saturated siding bays. This cost about 25 percent more up front than a siding-only quote but prevented a second emergency and preserved insulation—a clear lifecycle win for the owner.
Case 2 — Urban retail strip: parapet failure over EIFS and a tired TPO roof
Situation: frequent interior staining near parapets with visible EIFS cracking. The TPO membrane showed scattered blisters but was largely adhered. Owners considered a full re-roof and full reclad. Decision made: reflash parapet copings, replace localized insulation, then apply a silicone coating to stabilize the TPO for 7 to 10 years while scheduling EIFS repairs in phases.
Trade-off noted: coating preserved cash flow and minimized tenant downtime, but only because parapet caps and primary leaks were addressed first and manufacturer pre-approval for the coating was obtained. Coating without the parapet repair would have been a time-limited, expensive delay.
Case 3 — Midrise affordable housing: recurring patchwork repairs become capital program
Pattern: property managers had a history of spot roofing and siding repairs. Leaks recurred in different locations each season. After an audit that mapped 18 distinct leak locations and found localized sheathing rot, the owner chose a combined roof replacement and phased siding replacement on the riskiest elevations.
Why that mattered: consolidating work into a single capital project lowered the total lifecycle cost, simplified warranty claims, and reduced tenant disruption compared with repeated service calls. It also allowed coordinated flashing details to be specified and inspected before siding went back on.
- Procurement lesson: require photo-documented diagnostics and a manufacturer sign-off before accepting coating bids; this avoids paying for superficial fixes.
- Occupancy trade-off: coatings and targeted flashing work can often be staged with tenants in place; full siding replacement usually needs scaffolding and noise planning.
- Insurance/transaction reality: lenders and insurers sometimes insist on full replacement if substrate rot or structural compromise is documented—partial fixes may not meet their standards.
Next consideration: treat case studies as checklists—confirm who will fix the flashing, who will document substrate condition, and how payment milestones protect you from incomplete scopes before work begins.
Maintenance and preventative strategies to minimize future capital cost
Start with scheduled prevention, not surprise repairs. A modest, disciplined maintenance program reduces large capital outlays by catching small failures in flashings, gutters, and cladding before they rot sheathing or force a full roof replacement.
Practical tradeoff: spend on inspections and small targeted fixes now, or spend multiples later on substrate replacement and tenant disruption. Preventive work costs predictably and can be budgeted into operating expenses; emergency capital work is unpredictable and often more expensive per useful year added.
Recommended maintenance workflow
- Quarterly visual sweep: Document gutter function, visible sealant condition at windows and penetrations, and any new panel movement or fastener loss. Photograph and timestamp defects for trend analysis.
- Annual roof and wall audit: Hire a combined roofing and siding technician every 12 months to test flashings, inspect step and counter flashings, probe suspect sheathing points, and verify drain times on low-slope roofs.
- Two-year predictive tasks: Infrared or moisture-sensor scans after a major season (winter/spring) and selective replacement of short-lived sealants or backer rods before they fail.
- Reactive containment protocol: For any detected wetting, implement temporary drainage (downspout extenders, temporary scuppers) and schedule a targeted invasive check within 30 days to avoid hidden decay.
- Contract language and procurement: Use multi-year maintenance contracts with defined deliverables, photographed acceptance, and an option for bundled small repairs so contractors are paid to catch problems rather than simply fix emergencies.
- Lifecycle budgeting: Compute expected years added by each preventive action and roll those savings into a reserve line item instead of deferring to capital requests.
Limitation to watch: some treatments, particularly cosmetic recoats or caulking alone, create a false sense of security when substrates or flashings are failing. Use coatings and sealants only after verification that membranes and terminations are sound; otherwise you delay the inevitable and complicate future replacement.
Concrete example: A 40-unit apartment owner installed moisture sensors at key parapet locations and scheduled professional audits every spring. The sensors flagged rising moisture that led to replacing four sections of parapet coping and resealing counterflashings before extensive sheathing rot developed. The owner avoided a multisystem replacement and kept tenant relocation costs to zero.
Tactical insight: tie acceptance and payment to deliverables: photo evidence of dry-in, a short invasive-check log, and replaced detail photos. That forces contractors to address root causes rather than cover visible symptoms.
Next consideration: convert maintenance findings into a short priority list with estimated cost per year saved and schedule the highest ROI items first. That keeps capital spending predictable and reduces the chance that a siding service or roof waterproofing becomes an expensive repeat job.